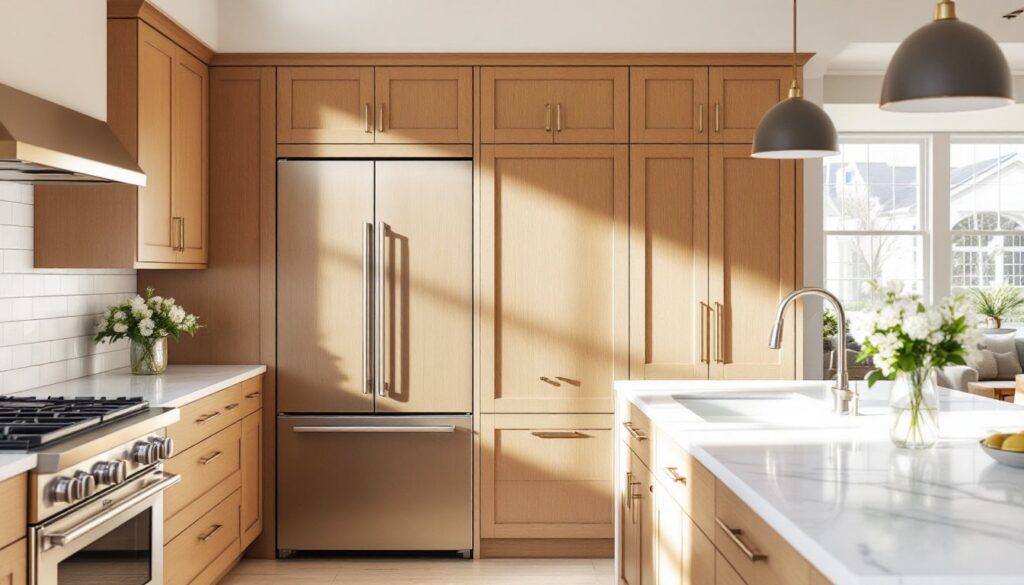

A panel refrigerator isn’t just another appliance, it’s a design choice that transforms how your kitchen looks and functions. Unlike traditional stainless-steel refrigerators that stick out like a statement piece, panel refrigerators integrate seamlessly into your cabinetry, maintaining clean sightlines and a cohesive aesthetic. Whether you’re remodeling a kitchen or simply upgrading an aging appliance, understanding what panel refrigerators are and how they fit your home is essential. This guide walks you through the basics, installation considerations, and maintenance tips so you can make an well-informed choice and tackle the project with confidence.
Table of Contents
ToggleKey Takeaways
- A panel refrigerator integrates seamlessly into cabinetry with custom panels, creating a cohesive kitchen aesthetic instead of making the appliance a visual focal point.
- Panel refrigerators cost $3,000 to $8,000+ for the appliance alone, plus $500 to $2,000 for custom panels and installation, making them 50% to 100% more expensive than standard models.
- Accurate measurements are critical during panel refrigerator installation—measure the opening at multiple points and account for reveals (gaps between panels and cabinetry) to avoid misalignment.
- Regular maintenance includes cleaning panels with appropriate wood cleaners, checking door seals and hardware quarterly, and ensuring level installation to prevent operational issues.
- A panel refrigerator is a long-term investment built to last 15+ years, making it ideal for homeowners planning to stay in their homes and prioritize kitchen design flexibility.
What Is a Panel Refrigerator?
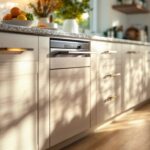
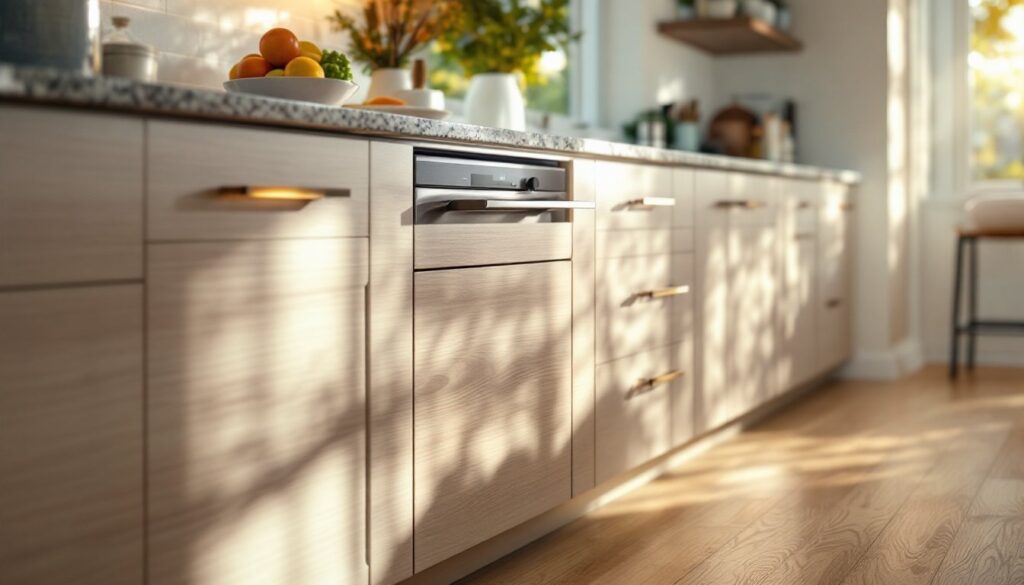
A panel refrigerator is a built-in or integrated appliance designed to accept custom cabinet panels on its front face. Instead of a finished stainless-steel or colored exterior, the refrigerator arrives with a blank panel-ready frame. You then install custom panels that match your existing cabinetry, whether that’s painted plywood, oak veneer, or whatever finish you’ve chosen for your kitchen.
Panel-ready models come in two main varieties: built-in (designed to sit flush with your cabinets) and counter-depth (shallower than standard 24-inch refrigerators, so they don’t protrude beyond your countertops). Standard full-depth models are 24 inches deep from the countertop: counter-depth models measure roughly 23 to 27 inches, depending on the manufacturer.
The panels themselves are typically 3/4 inch thick and attach to the refrigerator’s frame using a mounting system provided by the manufacturer. You’ll also need to source or fabricate matching stiles (vertical trim pieces) and hardware pulls that align with your cabinet design. This customization is why panel refrigerators appeal to homeowners who prioritize a unified kitchen aesthetic over a prominent appliance statement.
Why Panel Refrigerators Are Changing Kitchen Design
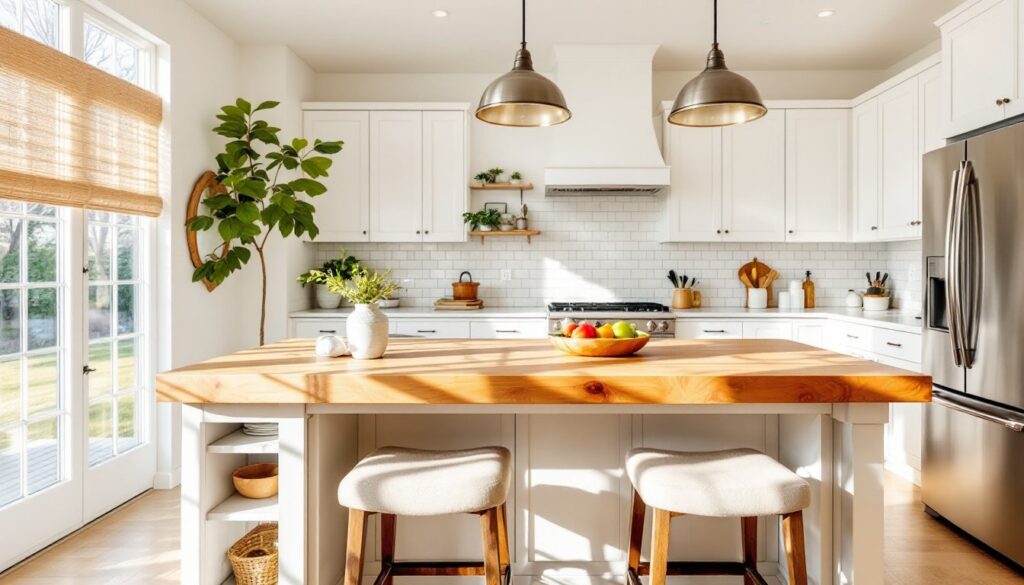
Modern kitchen design increasingly favors cohesion and minimalism over the showcase appliance trend. Panel refrigerators support that philosophy by making the refrigerator disappear visually, it becomes part of the wall of cabinetry rather than a focal point.
This shift matters because kitchens are now often the center of the home. When you’re cooking, eating, and entertaining in the same space, a large stainless-steel refrigerator can feel like an intrusion. Panel refrigerators let you control the visual weight of the room. You’re essentially saying, “Yes, there’s a refrigerator here, but I’ve chosen not to let it dominate the design.”
From a practical standpoint, built-in refrigerators with panel-ready options offer flexibility that standard appliances don’t. If you change your kitchen style in five or ten years, you can update the panels without replacing the entire unit. It’s a sustainable choice for the long term.
Panel refrigerators also eliminate some of the “kitchen appliance color-coordination” headaches. Whether your range is stainless, black, or soon-to-be-outdated “slate,” your refrigerator isn’t contributing to that visual clutter. This approach aligns with current kitchen design ideas emphasizing simplicity and intentional styling, particularly in open-concept homes where the kitchen flows into living spaces.
Installation Basics for DIY Enthusiasts
Installing a panel refrigerator is more involved than sliding in a standard appliance, but it’s manageable for someone comfortable with basic carpentry and measuring.
What You’ll Need:
- Panel-ready refrigerator (sized to fit your opening)
- Custom cabinet panels cut and finished to match your cabinetry
- Mounting hardware kit (included with the appliance)
- Shims (wooden wedges for leveling)
- Stiles and hardware pulls matching your cabinet design
- Drill, level, tape measure, pencil
Key Installation Steps:
-
Measure twice, order once. Confirm the exact opening dimensions (height, width, and depth). Panel refrigerators come in standard widths, typically 36, 42, or 48 inches, so your cabinetry opening must match. Measure the depth from the back wall to the edge of your countertop: counter-depth models work best in spaces with limited depth.
-
Prepare the space. Remove any existing appliance and ensure the surrounding cabinetry is square and level. Use a level to check both vertically and horizontally. If the opening isn’t level, shims will help, but significant gaps suggest the cabinet frame itself needs attention.
-
Deliver and position. Panel refrigerators are heavy: most weigh 300+ pounds. Recruit a helper and use a furniture dolly if possible. Carefully slide the unit into position. Do not remove the packaging until it’s in place and you’ve confirmed fit.
-
Level and shim. Use shims under the front corners to bring the refrigerator to level. Adjust until a bubble level placed on top shows true horizontal and vertical. Tight, level fit prevents door alignment problems later.
-
Install the panels. Once the refrigerator is positioned, follow the manufacturer’s specific mounting instructions to attach your custom panels. Most systems use a combination of screws, brackets, or adhesive strips. Panels must be secured before the doors are fully operational.
-
Attach stiles and hardware. Stiles (the vertical trim pieces between the refrigerator panel and adjacent cabinetry) create a polished transition. These are typically glued and screwed in place. Install your cabinet-matched hardware pulls once the panel is secure.
-
Level doors and check operation. Refrigerator doors must hang straight and seal tightly. Most panel refrigerators allow some adjustment at the hinges. Test the door operation and freezer drawer alignment before calling the job complete.
Common Mistakes to Avoid:
- Skipping the shim step. Even if the opening looks level, refrigerator doors demand precision. Unleveled units develop seal and closing issues.
- Ordering panels without accounting for reveal. A “reveal” is the small gap between the panel and adjacent cabinetry (typically 1/16 to 1/8 inch). Get this wrong, and the whole front looks misaligned.
- Assuming cabinet dimensions are accurate. Old cabinetry often isn’t square. Measure the opening at three points vertically and three points horizontally. Use the largest measurement to order your panels.
If your opening requires custom cabinetry modifications or if the space isn’t reasonably square and level, consider consulting a cabinet installer or contractor. Structural issues or permit concerns are beyond DIY scope.
Cost Considerations and Budget Planning
Panel refrigerators cost more than standard models, but the investment reflects what you’re paying for.
Appliance Cost: A panel-ready built-in refrigerator typically ranges from $3,000 to $8,000+, depending on brand, capacity, and features. Counter-depth models tend toward the upper end. This is roughly 50% to 100% more than a standard 36-inch stainless refrigerator, which might run $1,500 to $3,500.
Cabinet Panels and Installation: Fabricating or purchasing custom panels and stiles will cost $500 to $2,000, depending on material quality and complexity. If you’re sourcing panels from your original cabinetmaker, expect higher costs: if you’re having a local cabinet shop create them, you may find more flexibility in budget.
Professional Help: If you’re hiring a contractor to handle the entire installation, add $500 to $1,500 in labor. Some homeowners manage the refrigerator positioning and panel installation themselves but hire someone for the cabinetry trim and finishing touches.
Why the Cost? Panel refrigerators deliver a premium kitchen aesthetic, and manufacturers price them accordingly. You’re also paying for features often included in high-end models: premium compressors, better insulation, advanced temperature controls, and often quieter operation than standard refrigerators.
Budget Tips:
- Plan the purchase for slower appliance sales periods (late fall, early winter) when discounts are more common.
- Confirm all dimensions and specifications before ordering custom panels. Mistakes are expensive to correct.
- Consider whether you’re keeping this house long-term. If you’re planning to sell in three years, the ROI on a $6,000+ refrigerator is uncertain.
- Check if your existing cabinet maker can provide panels at a discount or if you can source quality plywood and stain it yourself to match.
Maintenance Tips to Keep Your Panel Refrigerator Looking New
Panel refrigerators require the same internal care as any appliance, regular condenser coil cleaning, filter replacements, and door-seal checks. But the external panels demand attention too, since they’re no longer the manufacturer’s finished product.
Panel Care:
Clean your panels regularly with the same cleaner you use on your cabinetry. If they’re stained or painted wood, use appropriate wood cleaners and avoid excessive moisture. Oil-based cleaners suited for cabinet finishes work well: avoid all-purpose cleaners that can leave streaks or dull finishes over time.
Protect panels from spills and moisture. Panel refrigerators positioned near a stovetop or sink may absorb steam or splashes. Wipe spills immediately, and consider applying a protective topcoat to the panels every few years if they’re in a high-moisture area.
Hardware Maintenance:
Cabinet-matched hardware pulls can loosen with use. Check and tighten bolts every few months. If your pulls are stainless or brass, occasional polishing keeps them looking intentional rather than neglected.
Door Seals and Alignment:
Over time, door seals (gaskets) lose elasticity and can allow cold air to escape. Clean the gasket groove quarterly with warm soapy water and a soft brush. If the door doesn’t seal tightly or you see condensation inside, the gasket may need replacement, consult your manual for the correct part number.
Panel-mounted doors depend on level installation to operate properly. If you notice the door is sagging or not closing flush, check that shims are still in place and the base hasn’t settled. A helper can hold the door while you assess, and you may be able to adjust hinges slightly to reestablish proper alignment.
Long-Term Investment:
Panel refrigerators are built to last 15+ years with proper care. The internal components are typically the same quality as high-end built-in units. Home improvement resources emphasizing durability and long-term planning often highlight that investing upfront in quality appliances and thoughtful finishes pays dividends through years of daily use. Treat your panel refrigerator as a long-term kitchen foundation, not a short-term appliance, and it will repay the care.
Conclusion
Panel refrigerators represent a conscious choice to prioritize design cohesion and long-term flexibility in your kitchen. They’re more expensive than standard units and require careful installation and measurement, but they eliminate the visual dominance of a typical appliance. For homeowners planning to stay in their homes for the long haul and who value a unified aesthetic, they’re a worthy investment. Take time to measure accurately, source quality panels that match your cabinets, and don’t rush the installation. The payoff is a kitchen that feels intentional and timeless.