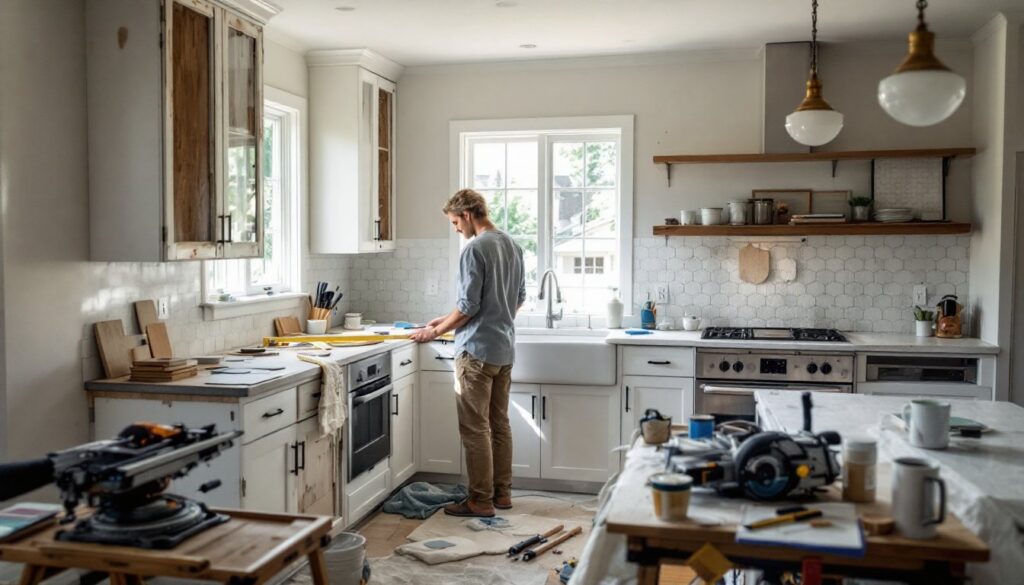

A kitchen remodel doesn’t have to drain your savings or require months of contractor negotiations. With Lowe’s Kitchen Remodel resources and smart planning, homeowners can tackle updates ranging from new cabinet hardware to full countertop replacements without sacrificing quality. Whether you’re refreshing aging cabinets, upgrading appliances, or completely reimagining the layout, breaking down the project into manageable phases and shopping strategically at Lowe’s keeps costs realistic. This guide walks through budget-friendly priorities, which elements deliver the best return on investment, and how to tackle the work yourself when possible. Smart planning and the right tools make a real difference, and so does knowing when to call a professional.
Key Takeaways
- A Lowe’s kitchen remodel can be budget-friendly by prioritizing high-impact elements like countertops and cabinetry refinishing over costly full replacements.
- Breaking your kitchen renovation into phased projects spreads costs and allows you to live with design choices before committing to the next phase.
- Cabinet painting, backsplash installation, and countertop updates are realistic DIY projects that can save thousands when paired with proper tools and materials from Lowe’s.
- Always allocate 15–20% of your budget as a contingency for hidden damage discovered during demolition and avoid common mistakes by measuring multiple times before cutting.
- Stock cabinetry, laminate countertops, and strategic use of Lowe’s tool rentals deliver the best return on investment for budget-conscious homeowners tackling kitchen updates.
Planning Your Lowe’s Kitchen Remodel on a Budget
Start by establishing a firm budget, then break it into priority tiers. A complete kitchen overhaul can run $50,000 to $100,000+, but cosmetic refreshes cost far less. The key is deciding upfront whether you’re updating fixtures, replacing cabinetry, or restructuring the space, each has vastly different price tags and timelines.
Visit Lowe’s in person or browse online to get real pricing on materials you’ll actually buy. Don’t rely on magazine estimates: local costs vary significantly. Create a spreadsheet with line items: cabinets, countertops, backsplash, flooring, lighting, and labor (if hiring help). Allocate funds proportionally based on what will drive the biggest visual or functional improvement.
Phased remodels often work better for DIY budgets. You might install new countertops and backsplash this spring, then refresh cabinetry next year. This spreads costs and lets you live with choices before committing to the next phase. Order samples from Lowe’s, paint colors, tile, countertop materials, and live with them in your actual kitchen lighting for a few days. Impulse purchases kill budgets.
One practical rule: spend more on elements you use constantly (countertops, cabinet handles, sink faucet) and less on purely cosmetic choices you can swap later (hardware, light fixtures). A durable countertop lasts 15–20 years: a paint color gets boring after three.
Essential Kitchen Elements to Prioritize First
If your budget is tight, focus on items that make the biggest visual and functional impact. Cabinetry often consumes 30–40% of a kitchen budget, so consider refinishing existing cabinets or installing new doors and hardware instead of replacing the entire boxes. A fresh coat of quality paint and new hardware on original cabinets can look nearly as good as new cabinetry at one-third the cost.
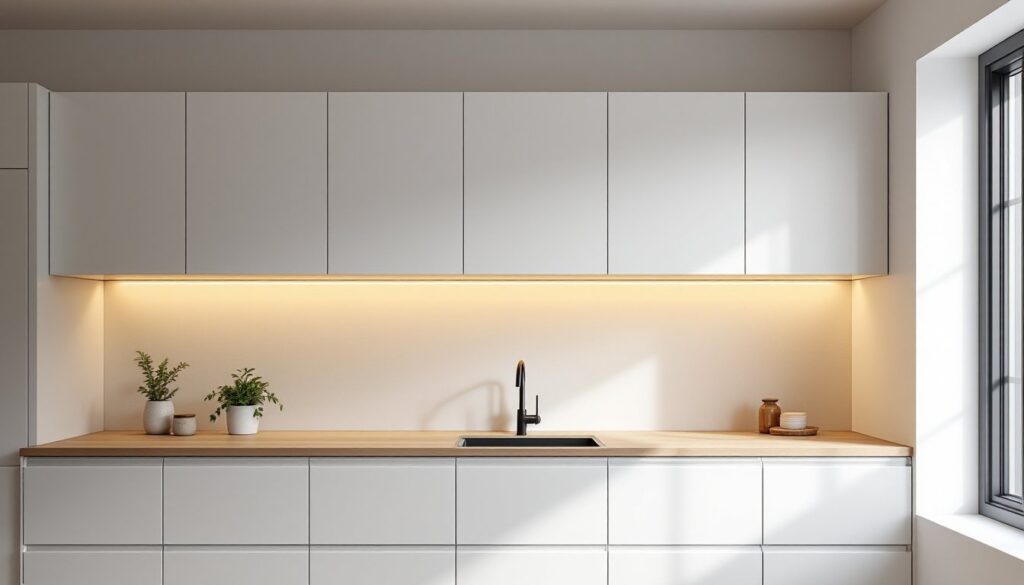
Countertops come second in priority. Worn or stained counters age a kitchen faster than almost anything else. Lowe’s offers laminate, butcher block, tile, and quartz at various price points. Laminate starts around $10–$20 per linear foot: quartz runs $40–$150+. You can install laminate countertops yourself with a router and miter saw if you’re comfortable with angles: quartz typically requires professional fabrication and installation.
Backsplash and paint deliver high visual returns for modest budgets. A subway tile or peel-and-stick backsplash transforms the wall behind the sink and cooktop. Painting cabinets or walls shifts the entire feel without structural work. Both are realistic DIY jobs with the right prep.
Sinks, faucets, and lighting matter more than most people realize. Replacing a dated faucet takes two hours and costs $100–$400: swapping fixtures and adding under-cabinet lighting modernizes the space instantly. These upgrades don’t require permits or structural permits in most areas, making them low-friction updates.
Lowe’s Tools and Products for DIY Kitchen Updates
Lowe’s tool rental section is a budget-saver for one-time projects. Need a tile saw for backsplash work? Rent it for $40–$60 per day instead of buying one for $300+. A pneumatic nail gun, miter saw, or oscillating multi-tool become affordable when rented. Plan your project timeline so you rent tools for one solid weekend rather than spreading work across weeks.
For cabinet refinishing, you’ll need a sander (orbital or mouse-type), painter’s tape, drop cloths, primer, and semi-gloss or satin cabinet paint. Sherwin-Williams or Benjamin Moore cabinet paints from Lowe’s handle kitchen moisture and grease better than standard wall paint: they cost more but last years longer. Budget $100–$200 for a full cabinet set (primer and paint).
Countertop work demands accurate measurement, a circular saw or miter saw for laminate, a router for edge treatment, and a jigsaw for sink cutouts. Quartz requires professional cutting, so skip this if you’re going that route. Tile backsplash needs a wet saw (rent one), notched trowel, grout, and a grout sealer. Cheap grout stains and cracks: Lowe’s carries epoxy grout that resists staining, spend the extra $20 per bag.
Don’t skimp on safety gear. Wear a dust mask or respirator when sanding cabinets or tile, safety glasses around power tools, and gloves when handling adhesive or grout. Proper ventilation prevents respiratory issues: open windows or set up a shop fan even if it seems excessive.
Tackling Common Kitchen Remodel Projects at Lowe’s
Cabinetry and Storage Solutions
Cabinet painting is a legitimate DIY project that can save thousands. Clear everything out, remove doors and hardware, and sand lightly with 120-grit sandpaper to rough the surface. Prime with a bonding primer formulated for cabinets (not drywall primer). Apply two coats of semi-gloss paint: allow full cure time (usually 48–72 hours) before remounting doors. Expect 3–5 days total, including drying time.
If replacing cabinets entirely, stock cabinetry from Lowe’s (rather than custom) keeps costs manageable. Standard sizes come in 3-inch increments: measure your existing cabinet openings carefully. Installation requires a level, stud finder, and shims (thin tapered wedges). Cabinet doors need adjustment after hanging, this takes patience but isn’t complicated. Most kitchens accommodate stock cabinet sets because builders use standard 24-inch depths and standard heights.
Adding open shelving or a kitchen island increases storage and style. Lowe’s sells pre-made bases and tops, or you can frame shelves from 2×10 lumber and support them with brackets rated for the load you’ll place on them. An oversized shelf holding pots and pans needs heavy-duty brackets: decorative shelving with light items can use lighter fasteners.
Countertop Upgrades and Installation Tips
Laminate countertops are the most budget-friendly DIY option. Lowe’s sells laminate sheets (usually 25–30 linear feet per sheet) and edge banding in coordinating colors. Measure top edges, width, and length carefully, allow 1/4-inch overhangs on sides and back. A router with a flush-trim bit creates a clean edge where sheets meet: a jigsaw handles sink or cooktop cutouts.
Butcher block offers warmth at mid-range pricing ($30–$50 per linear foot installed). It requires periodic oiling and won’t tolerate sitting water, so it’s best suited for islands or lighter-traffic areas. Apply food-grade mineral oil every month during the first year, then quarterly. Tile countertops let you use small accent tiles mixed with neutral base colors for personality. Budget extra time for grouting: poor grout sealing leads to staining and water damage.
Quartz countertops look luxurious but require professional templating and installation, most Lowe’s locations partner with fabricators who handle this work. You won’t save money going DIY here, but Lowe’s coordination simplifies the process. Installation takes 2–4 weeks from order to final fitting.
Always allow new materials to acclimate to your kitchen for 48 hours before installation. Wood products and some laminates expand or contract with humidity changes. Skipping this step causes alignment problems and gaps after installation settles.
Avoiding Common Mistakes in Your Kitchen Renovation
The biggest mistake homeowners make is underestimating prep work. Cleaning, sanding, and measuring take longer than cutting and installing. Budget twice as much time for preparation as for the actual work. A countertop that looks simple, measuring, templating, cutting, installing, easily takes two full days when done properly.
Measuring once and cutting once sounds smart but fails constantly. Measure twice, cut once is the carpenter’s rule for a reason. Crooked or uneven surfaces in older homes mean measurements from different points vary. Check your countertop at multiple spots: wall-to-wall distances often differ by half an inch or more. Use this variation to your advantage, cut pieces slightly oversized, then trim during installation.
Ignoring building codes and permits creates problems if you’re doing structural work. Removing a load-bearing wall, moving plumbing, or upgrading electrical for new appliances requires permits in most jurisdictions. Unpermitted work can void insurance, complicate future home sales, and create safety hazards. DIY-friendly updates like painting, hardware, and backsplash don’t typically require permits, but check your local building department first.
Budget bleed happens when you discover hidden damage during demolition, water-damaged cabinet bases, mold in walls, or out-of-code electrical that needs replacing. Set aside 15–20% of your budget as a contingency. When you hit it, great: if not, you’ve cushioned against surprises.
Final tip: don’t mix old and new materials haphazardly. If you’re refinishing existing cabinets alongside new countertops, make sure the overall aesthetic works. A farmhouse backsplash clashes with sleek modern hardware. Lowe’s in-store design consultants can sketch rough layouts: using this free service saves money on poor material choices. Kitchen cabinet costs vary widely, and planning prevents overspending on mismatched finishes. Check ImproveNet’s remodeling guides and Remodelista’s design inspiration for direction before shopping.