
There’s nothing more frustrating than pushing your Shark vacuum across the carpet only to watch dirt spray back onto the floor. When a vacuum starts ejecting debris instead of collecting it, the culprit is usually something simple, and it’s almost always fixable without calling a repair tech. Most dirt-spitting issues stem from clogged filters, blockages in the airflow path, or an overstuffed dust cup. The good news? You’ve got the tools to diagnose and resolve these problems yourself. Let’s walk through what’s causing the mess and how to get your Shark vacuum back to quiet, effective operation.
Key Takeaways
- Most Shark vacuum dirt ejection issues stem from clogged filters, airflow blockages, or an overstuffed dust cup, all of which are fixable without professional repair.
- Clean foam pre-filters every 3–6 months by tapping and rinsing with lukewarm water, but never rinse HEPA post-filters as water damages their delicate pleats.
- Check and clear blockages in the hose, intake port, dust cup airflow valve, and brush roll area—a 15-minute inspection that often restores 20–30% of lost suction.
- Empty the dust cup when the fill line appears and maintain 2–3 inches of empty space to keep the pressure chamber balanced and prevent dirt from spraying back out.
- Establish a preventive maintenance schedule with filter cleaning every 6 weeks if you have pets, monthly hose inspections, and proactive filter replacement every 12–24 months to avoid recurring issues.
- Store your Shark vacuum in a cool, dry environment and dry the dust cup immediately after vacuuming spills to prevent moisture-related clogs and mold growth in filters.
Common Causes of Shark Vacuum Dirt Ejection
Before you start disassembling your vacuum, understand that dirt ejection typically points to three core issues: restricted airflow, a compromised filter system, or the vacuum working too hard because it can’t breathe properly. When suction drops, the motor compensates by running harder, and the pressure inside the dust cup builds up. That pressure has to escape somewhere, and if it can’t exit through the exhaust, it forces dirt back out the intake port or seals.
Think of your vacuum like a two-way street: air and debris flow in, but clean air needs to flow out just as efficiently. Blockages, clogs, and full cups disrupt that balance.
Clogged Filters and Blockages
The filter is your vacuum’s lungs. When it clogs, suction plummets and pressure inverts. Shark vacuums typically use foam pre-filters (the outer layer that catches large debris) and HEPA post-filters (the inner filter that captures fine dust). Over time, both layers trap hair, pet dander, and dust, restricting airflow. Many homeowners clean or replace only one filter and miss the other, a common mistake that leaves half the problem unsolved.
Blockages also occur in the air passage itself. Hair wraps around the brush roll and migrates into the hose, intake ports, or the narrow channel between the dust cup and motor housing. Check these spots first: they’re the most common culprits and the easiest to clear.
Full Dust Cup Issues
A full or nearly full dust cup reduces the air chamber, forcing pressure to build faster. Unlike bagged vacuums, which maintain consistent suction even when partially full, bagless models like Shark need adequate empty space in the cup to function properly. Most manufacturers recommend emptying the cup when it reaches the fill line, not when it’s completely packed. Overfilling reduces effective capacity and forces the motor to work harder, which can trigger pressure release through the intake side.
Also, moisture or compacted dust inside the cup can block the airflow port at the bottom, creating a suction vacuum (literally) that sucks dirt back out.
How to Clean Your Shark Vacuum Filters
Filter maintenance is where most DIYers save themselves a service call. Here’s the right way to do it.
Step 1: Locate Your Filters
Open the dust cup access panel and locate both the foam pre-filter (usually a yellow or gray foam sleeve around the motor chamber) and the pleated HEPA post-filter (a tall, accordion-style filter inside or above the cup). Shark models vary slightly, so check your owner’s manual to confirm the exact layout.
Step 2: Remove and Tap Out Debris
Carefully lift or unclip each filter and hold it over a trash bin. Tap the filters gently against the bin’s side or your palm to dislodge trapped dust. Don’t compress or squeeze the filter, you’ll drive dust deeper into the fibers. For stubborn buildup, tap for 10–15 seconds per filter.
Step 3: Rinse (Pre-Filter Only)
The foam pre-filter can be rinsed under lukewarm running water. Let water flow through it (not against the grain) and gently rub away visible buildup with your fingers. Rinse until water runs clear. Shake out excess water and allow it to air-dry completely, at least 24 hours, before reinstalling. Never install a damp filter: it’ll clog faster and reduce suction.
Do not rinse the HEPA post-filter. The pleats are delicate and water degrades the media. Stick to tapping.
Step 4: Replace if Needed
If your filter is more than 6–12 months old, heavily discolored, or visibly damaged (torn pleats, collapsed sections), replace it. Filters cost $20–50 depending on your Shark model, and replacement is much cheaper than repairing a burned-out motor from prolonged restriction. Shark sells genuine filters, but third-party options from reputable suppliers work fine if they match your exact model.
Step 5: Reassemble
Make sure filters are fully dry, then reinstall them in the exact order: pre-filter first, then post-filter. Ensure clips or seals are tight. A loose filter lets unfiltered air bypass into the motor, which shortens its lifespan.
Clean your filters every 3–6 months under normal use, or monthly if you have pets or allergies. This single task prevents 80% of suction loss.
Checking and Unclogging Vacuum Airways
With the filters handled, hunt down blockages in the airflow path. These are often invisible until you know where to look.
The Hose and Intake Port
Detach the hose from both the dust cup and the motor head. Hold it up to a light source and look through it. If you see hair bunches or dust clumps, you’ve found a major culprit. Feed a straightened wire coat hanger or a plumbing snake through the hose to break up the clog. Alternatively, use a plunger, place the hose opening in a bucket and plunge several times to dislodge debris. For stubborn blockages, soak the hose in warm water for 30 minutes, then flush it with a garden hose outdoors.
Next, inspect where the hose connects to the dust cup. Shark vacuums often have a small curved intake port here. Hair commonly wraps around the interior ridge. Use needle-nose pliers or tweezers to pull out any visible debris.
The Dust Cup Airflow Port
At the bottom or side of the dust cup, there’s an air relief valve or exhaust port. This tiny opening allows air to escape. If it’s blocked, pressure reverses. Empty the cup completely, then inspect this port with a flashlight. Use a straightened paper clip or small brush to clear any dust or lint buildup.
The Brush Roll Area
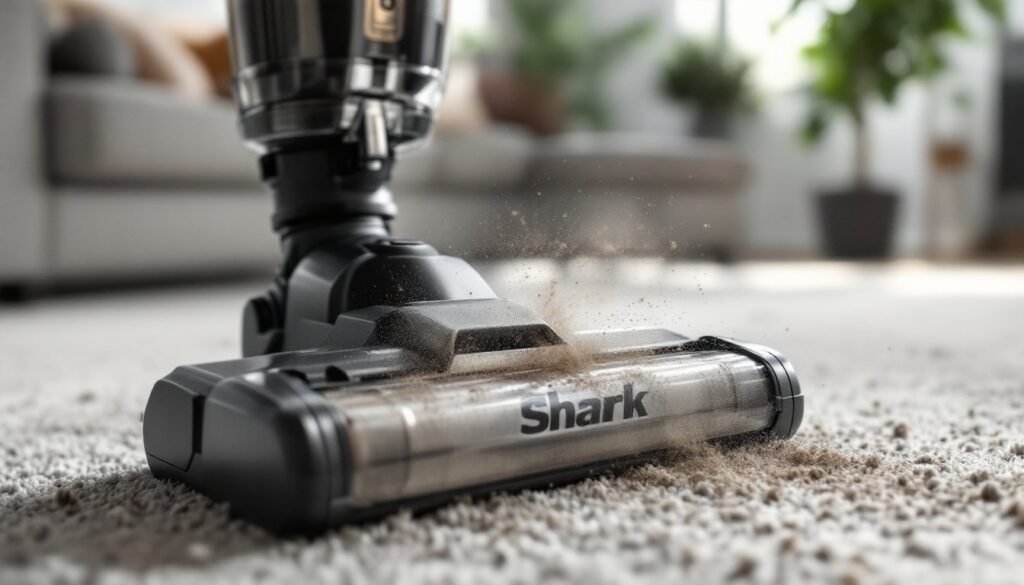
Hair wrapped around the brush roll doesn’t directly cause dirt ejection, but it reduces suction overall, forcing the motor to compensate. Flip the vacuum upside down and use scissors to carefully cut away any hair wrapped around the roll. Avoid cutting the bristles themselves. Clearing this area often restores 20–30% of suction on its own.
These checks take 15 minutes and reveal blockages that cleaning filters alone won’t fix.
Proper Dirt Cup Maintenance and Emptying
The dust cup is where airflow begins. Treat it carefully.
Empty Frequently
Don’t wait for the cup to overflow. Empty it every time the fill line is visible from the outside, or after every two to three rooms on a normal carpet. This keeps pressure balanced and prevents compacted debris from blocking internal ports.
Clean the Cup Interior
Once monthly, remove the cup and tap out fine dust, then wipe the interior with a slightly damp cloth. Dried moisture or stuck-on dust can seal off air passages. Pay attention to the underside where debris collects. Let it air-dry before reattaching.
Inspect the Gasket Seal
The rubber gasket or seal where the cup locks onto the motor housing can crack or degrade, allowing air to leak in rather than travel through the filter system. If you see gaps, dirt, or hardened rubber, the seal needs replacing. This is a $10–20 part and a 2-minute swap. Check Good Housekeeping’s reviews on home appliances for guidance on maintenance schedules for your specific model.
Avoid Overfilling
The dust cup isn’t actually a cup, it’s a pressure chamber. Overfilling reduces the air space, which is critical for suction to work. Think of it like a balloon: once you pack it too full, the pressure can’t equalize, and things start spraying out. Keep at least 2–3 inches of empty space above the fill line during normal use.
Prevention Tips to Keep Your Vacuum Running Smoothly
Once you’ve fixed the dirt-spitting issue, keep it from coming back with these simple habits.
Establish a Filter Cleaning Schedule
Mark your calendar for filter maintenance every 6 weeks if you have pets, or every 8–12 weeks without pets. This is the single biggest preventive measure. Clogged filters are the root cause of 70% of Shark vacuum complaints.
Vacuum Your Carpets First
If your carpets are heavily soiled or shedding, do a rough pass with a carpet rake or broom first to remove clumps of hair and large debris. This extends filter life and reduces strain on the motor. It sounds like extra work, but it saves time on maintenance later.
Check Hoses and Ports Monthly
A quick 2-minute inspection monthly catches blockages before they become problems. Shine a light through the hose, inspect the intake port, and make sure the air relief valve isn’t clogged. Prevention beats troubleshooting.
Replace Filters Proactively
Don’t wait until they’re destroyed. Replace HEPA filters every 12–18 months depending on use, and foam pre-filters every 18–24 months. Preventive replacement costs less than recovering from a clogged motor or burned-out bearing.
Store in a Dry Environment
Moisture accelerates dust clumping inside the cup and promotes mold growth in filters. Store your Shark in a cool, dry closet or garage, not a damp basement. If you’ve vacuumed up moisture (wet spills or cleaning), empty and air-dry the cup immediately.
Personal maintenance habits matter more than expensive repairs. A Shark vacuum maintained well lasts 8–10 years: one neglected may fail in 3–4. CNET’s comprehensive appliance reviews can help you evaluate when replacement is more cost-effective than repair.
Get Your Vacuum Back in Action
Dirt spitting is your Shark’s way of saying it’s struggling to breathe. Ninety percent of the time, the fix is simple: clean those filters, clear the blockages, and manage the dust cup properly. Start with filter cleaning and hose inspection, these are almost always the answer. If problems persist after you’ve tackled those, the gasket seal or motor housing may need professional attention, but that’s rare. Most homeowners solve the issue in under an hour with tools already at home. Once you’ve fixed it, stick to a maintenance routine and you’ll avoid this headache for years to come.